Tuesday, 25 September 2012

The Austin 7 Ace Project


Over the last two years, when time and good weather have allowed, I have been refinishing a friend's 1932 Austin 7 Ace sports car. Just another reason the Zephyr is not yet ready for the road.

The finished paint job


Two years ago; first undercoats on. Many hours of sanding and repainting were required as it is 80 years old and had a good shunt up the rear before the mid fifties. I know this because the owner from this era is a member of the Austin 7 Club locally. Bits of oil can were found grafted in to the tail! Both sides were completely replaced as part of the panel work before it came to me.


This is what I started with; plenty of bog, ripples, hollows and scratch marks from the panel work. One of the guards got a few spots of rain on it, so had to be reprimed and painted. The joys of having to work outdoors!

The rear guard primed for the second time. A couple of ripples can still be seen near the trailing edges of this guard even at this stage.


Rear guard top coat fresh off the gun.


Celebrity endorsed paint job!
Sparkling Monza red after cutting back with 1200 grit and machine polishing with two grades of cutting compound. Swirl remover is next.


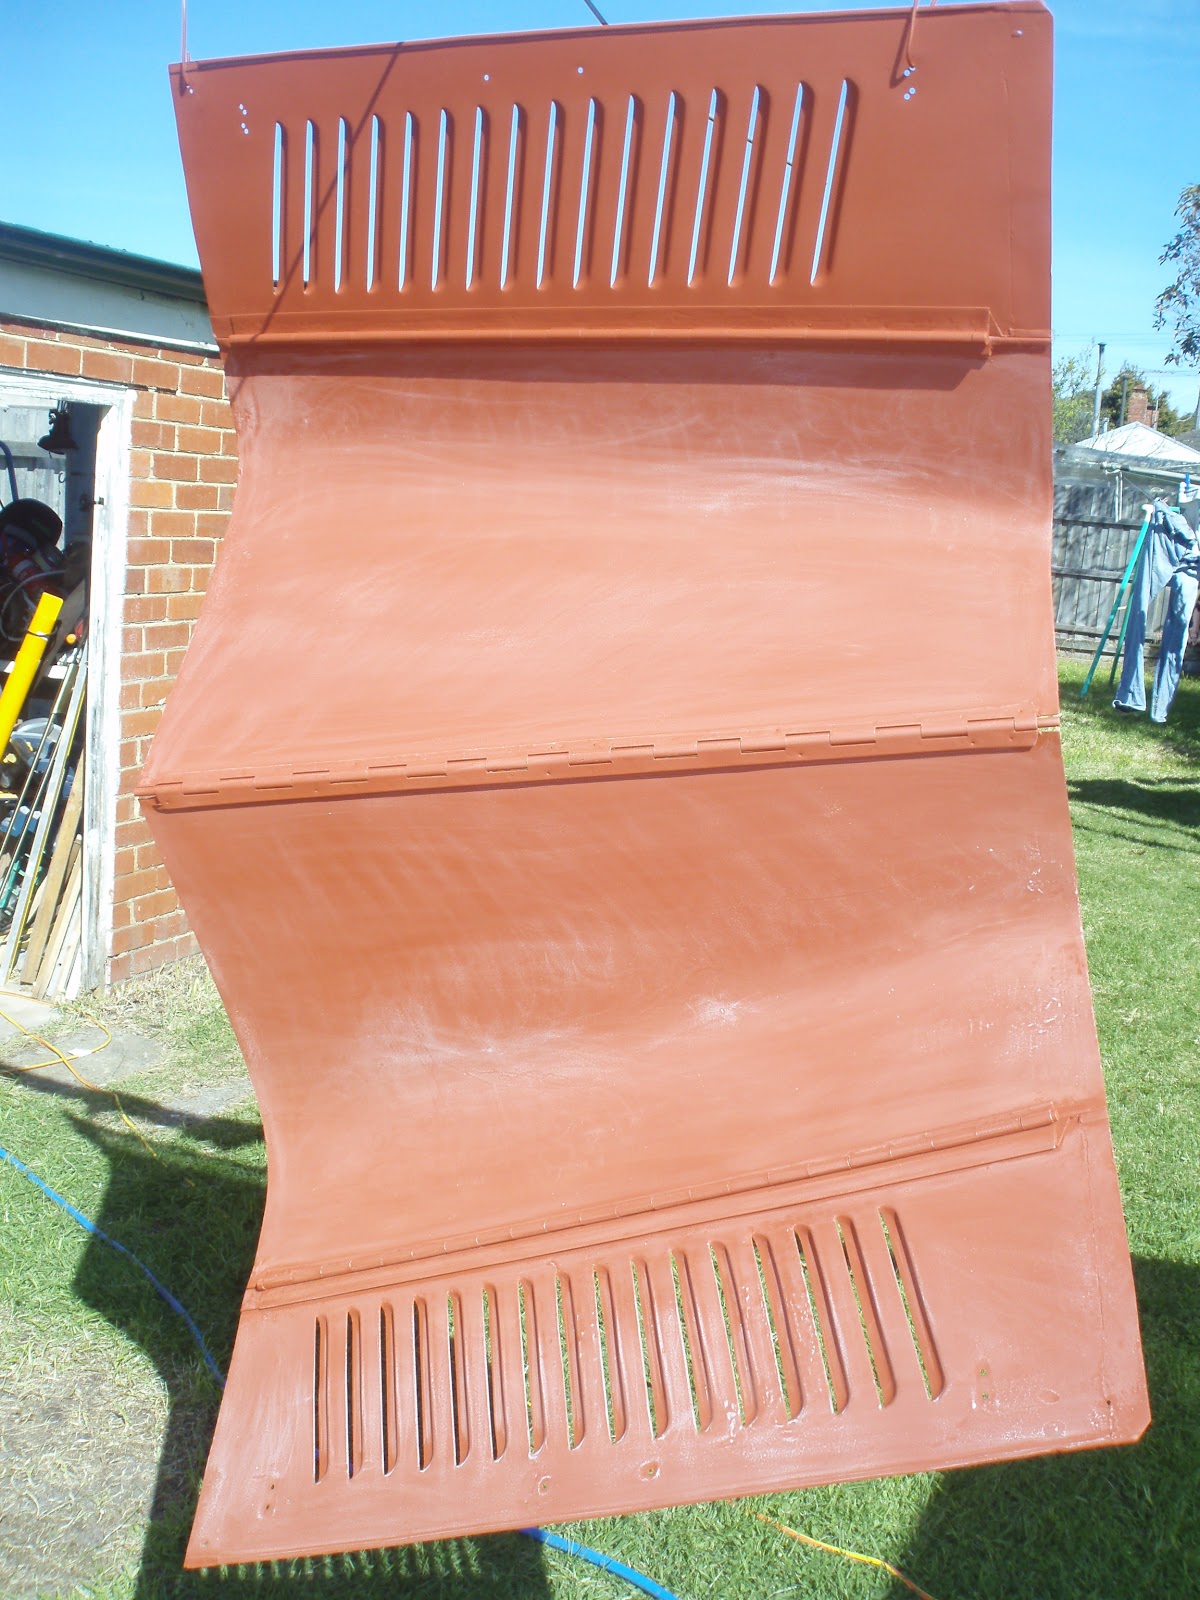
Painting the bonnet presented some challenges.


Primed and the inside painted red.


Spot putty was next followed by heavy coats of primer over the block sanded filler. This process is repeated a number of times to achieve the desired smooth finish. Time was against me on this one and I didn't have the luxury of doing this 10 or more times to get it perfect.


A few days ago the car was driven here under it's own power for the first time. A sparkling new registration plate takes pride of place at the front and rear, having passed the Roadworthy Certificate examination earlier in the week. The front guard, valances and bonnet are still to be cut and polished.

 This is what makes it all worth while. It is great to see this beautifully proportioned car looking better than it did 50 years ago.

The hood is back with the upholsterer to make some changes.


The hood cover the first edition. The akward looking upright bits are being "smoothed over", after owner, Dennis, arranged a hinge to stow the section over windscreen flat when not fitted.


A very difficult windscreen to get watertight.


A "top" choice for fabric colour to go with the Monza red.

 The Austin 7 Ace is a 4 cylinder 750cc four stroke engined motor car built in England and bodied here in Australia. Production of the 7 started in 1922 and continued until 1938. It was the British answer to the Model T, in many ways, being dubbed "the motor for the millions". This car has a four speed gearbox ith syncromesh on 3rd and 4th. Brakes are linked to all four wheels.

 This Ace handles very well for a car of it's age and has surprisingly nippy performance.

Monday, 24 September 2012

Other projects

Another bike picked up from "hard waste" - Giant MTX 150. My eldest daughter used this for 2 years, until upgrading to a 24 inch wheeled bike. This is great bike, aluminium framed, light weight yet very well built. My youngest daughter was to have it next, but she didn't like the colour! I managed to find her a Raleigh aluminium framed bike that was brand new, used once and was the right colour. The cost was $30. It had a loose crank set - not an uncommon fault on bikes; a lot of people don't realise the left side is left hand thread, so end up loosening rather than tightening the nuts. After ten minutes adjusting the crank and brakes it was just like new. That left me with this bike surplus. The wheels were not the right ones; steel rimmed and they had rusted quite badly. I'd had another front for some time. Then I picked up the rear wheel... well, you know how by now! The front brakes needed replacing and surface rust removed from the handle bars and anciliaries. Once done it sold on Ebay for $146!

The two rear bikes came from hard waste at different times

 A better view of one of the bikes collected from the side of the road. This is "Lady Goose",  from the Mongoose range of bikes. This one has no parts I need, so I will sell or give it away. It's a surprisingly good condition bike.

My Cruiser bike. Bought used from Ebay for $120. I have done some pinstriping on this one, but I'll finish the job before publishing. It has flame tread tyres and 72 spoke wheels and is really fun to ride..

A project from 9 years ago, a 1950's Cyclops Comet pedal car.

  They are fairly common here in Australia. This one came without wheels but was otherwise complete, just bashed about. To be expected, I guess. I chose this one as it had no major rust. Firstly it was sent off to the sandblasters, then off to a friend for panelbeating. To get the flutes in the front straight, Reg had to cut the front off. This suited my intentions perfectly, as he then de-seemed the front and the line along the side that were originally just spot welded. The holes in the front where the fake radiator cap once bolted on were filled when I got it back and this also helped with my hot rod "shaved" look.
 Next was the paint job - not well shown off here, due to poor light. It is a "candy apple" scheme in "organic green". Candy apple is a technique as well as a brand name, and not a shade of red as many think. It is basically a translucent colour added to the clear coat sprayed over a silver base coat. The paint still hasn't been cut and polished, but will now need to be done as the gloss is beginning to fade.
One day I will find the set of racing go kart front wheels and tyres that I have always intended to put on.

A bookshelf that I made a few years ago.

.


Project "Tandem BMX bike"

 More than nine different bikes were used as parts donors to make this one of a kind BMX.


Built entirely from scrap bikes left on the side of the road for the annual "hard waste" collection, this tandem project has cost less than $10.

Initially put together about two years ago, this project was servicable but scruffy and unfinished. The last "hard waste" in August saw some very tidy bikes put out for scrap. Being out on the scavenge for bits for another project, it was too tempting to collect some bikes with useful parts to upgrade the tandem.

Some decals left over from a paint job 16 years ago finished the look off quite nicely.

 This picture shows the almost new wheel (one of a pair) that I got last month. The rear brake has now been installed and tabs welded on for the gear change cable. The cable was run in and connected after this photo was snapped, as the light was starting to fade.

 Front forks were replaced, again from the spoils of the last "hard waste" as they had better brakes fitted.

My girls chose the colour from a limited palate made up of "mistinted" paints bought cheaply. It is brush painted in enamel house paint.

A few hours with a paint brush and the job looks a lot tidier. I got a little carried away with the pinstriping!

This photo, although out of focus, shows where the seat post from another bike was inverted and stitched in between the two 20" frames to give the rear rider (stoker) enough room. The join was then bogged over and smoothed. The goose neck for the rear handle bars has been turned around to give the "captain" enough room on the seat.


Finishing touches like the reflecters, handle grips, crash pads, seats and coloured pedals all came in the last batch of bikes pilfoured for parts.

One of the toughest things to sort out was the chain set up. Two sprockets were welded together on the rear crank. Enough space had to be left for the counter rotating chains at the back of the sprockets. The final drive sprocket is welded on the outside and is a smaller diameter to reduce the chances of anything catching between the two. Originally both bikes were "coaster wheel" brake (back pedal for brakes); not a good idea for a tandem. I couldn't find a freewheeling hubbed wheel, so I stretched the rear forks out a little and fitted a six speed wheel. This has some advantages for riding, but meant more work to set up.
 Tensioning the front chain was also a challenge. Ideally I only wanted a single idler sprocket. Most tandems use an adjustable rigid mount idler sprocket. It was far easier to set up a deraileur to achieve the tension and I like the idea of the spring action. It seems safer for kids some how.


Saturday, 18 August 2012

The heart of things


The engine bay, showing the Ford Zephyr 2553cc engine derived from the 4 cylinder 1703cc Consul.

The motor in this Mk3 is undoubtably the original. No obvious works have been carried out, yet it starts first turn every time ( so long as the battery is strong enough) A slight tappet noise is the only detraction - an easy fix that will be attended to when it goes for a tune up after everything else is sorted.


Note the "T" on the vacuum pipe for the trailer vacuum pipe mentioned earlier. This is one of the few parts to be replaced to return the car to original. There is still an intermitant vacuum leak some where though...

It is tempting to get in and clean, renew, polish and paint all the tired parts in here. That won't happen while I own it. Ralph will be preserved as is for future generations. Easy I guess. Easier than countless hours of cleaning and repainting, etc. Still there are many dilemnas. Do I, for example, change to a spin on oil filter conversion?
The radiator hoses are in poor condition. I have 2 new sets, so I will replace them - pointless preserving the car if you seize the motor by ignoring basic maintenance and then have to change a heap of parts.
The spark plugs have been replaced and the leads and distributor cap will also need renewing. I will, however, keep the perished rubber caps.

Ford Zephyr mk3 motor

The horns on the right were full of wasps nests and don't work. Does anyone have a couple of spares for sale? A set of tacky air horns will have to suffice for now.

Wednesday, 8 August 2012

Power to the Zephyr!

Since deciding to keep the Mk3 Zephyr authentic and as original as practical and the battery was getting weak (from jump starting too many friends and neighbours!) it was time to visit the guys at Ariel batteries. Located in Clifton Hill, this place really is a time warp. Etablished in 1947, you have no problem believing the truth of this - most of the equipment still in use is from 1947! Not much has changed in 65 years. The best part, though, is real service from an age gone by. Finding an old style 12 inch rubber case (brand new) was not a problem and my battery was ready in a few days.


The battery even looks alot like the one shown in the original manual.


This sure kicks the motor into life quickly.

 A battery clamp had been made from scrap lying around and it didn't look too bad. As the chances of finding the correct clamp seemed unlikely I had spent a bit of time making it look good. However, the right one did happen along, and after selling a lung to fund it, I have the perfect way to hold the period battery in place. Detracters might say it's a bit rusty, but painting it will only make the rest of the engine bay look even worse! As it is the clamp fits in like it has always been there. I can't ask for more than that.
 Due to a return trip to NZ for a holiday and then getting a really bad flu from my daughter (sharing is caring, right?) I have fairly well written off July. August has started strongly, though. Another Globe mag wheel is now polished and will be painted black as soon as the weather improves.

Saturday, 21 July 2012

1963 Ford Zephyr Mk3 Barn Find Progress Report

Rear View of the car called Ralph.

In this shot taken last night, the newly repainted bootlid can be seen reflecting the evening light in a way the rest of the car doesn't. The poor colour match is not so evident in this light, but at this angle the panel work below the right tail light is quite obvious. No history of this car is known, so exactly why each side has a dent in this particular spot is a mystery. Over all, though, this is quite a flattering photo. The Hustler mag wheels on this side have not yet been polished, but still suit the car.

One of my favorite views of the Mk3 Zephyr, a pose I plan to turn
 into a work of art one day soon. Watch this space...

Out with the camera last night for some twilight shots of my project car, "Ralph", the mk3 Zephyr barn find car that is currently being recommissioned for road use.

The repainted bootlid fitted temporarily to "Ralph"
whilst the other bootlid gets a meticulous resto.

I recently found out the hard way that access to the boot from inside the car is not too difficullt - having fitted the temporary bootlid and slammed it shut, tight on the old rubber seal, I tried to reopen the boot for a little fettling. That's when it became apparent that the newly fitted lock did not engage well with the opening mechanism! Try as I might, the only way to get the lid up again was to be from the inside. Lucky that the rear seat is easy to remove! This was likely the first time in it's life that it had been out. No secret mesages hidden in there from factory assembers of days gone by, though - damn!

An odd shot - the neighbours roofline doesn't sit well with the overall impression.

Tuesday, 17 July 2012

The Road Worthy Condition Cert. (RWC)

 A permit was obtained to allow Ralph, my Mk3 Ford Zephyr, to be driven on the road so that a RWC could be carried out. The underside has been cleaned with degreaser and nice condition black paint was found over most of the floor. The old English car oil leaks have a use after all! Electrical earths were improved. Positive earth of course. The wheels were changed as the Hankooks that came with Ralph were perished and the treads cut on two of the four.


The muffler off the last Z.

 The muffler was also replaced. It was no where near as bad as the one off Z no.3 (above), but the 12 inch "Hot Dog" had a split in the weld that attached it to the pipe at the front. Yes, I know it could be welded, but I also know that these repairs are notoriously unreliable because of all the soot in the crack. This car is for the family and their safety comes first!
 Trying to find a muffler under $100 was not easy. Some were on Ebay, but postage took care of much of the saving. I had planned to fit the muffler myself. The one that was on the car was held on by clamps - too easy! Eventually I arrived at a local workshop and a suitable muffler was not in stock. However one could be ordered in. It was only $60. Then the proprietor had a look underneath. He wasn't really happy about such a small muffler, saying it would be too loud. I like the sound a Zephyr makes. It has a unique bark at certain revs as one accelerates up the gears. The 12 inch straight through muffler was a little loud, OK, quite a bit loud, but then it meant that lovely tune could be appreciated behind the wheel. So a 12 inch it was going to be.
 While looking under the car again, I again spied the clamps. And a few more clamps  - five in all from just in front of the rear axle to the rear tip. As a throw away comment, I asked how much for a new curve over the axle and one piece welded pipe/muffler all the way to the rear. When the reply came back at $100, I couldn't say "do it" fast enough!
 The result was a great job and was even finised with a chrome tip. I was very pleased and it does sound fantastic, like the sort of sound a sea lion bull makes when being sat upon by an elephant.


The Globe alloy wheels fitted with Hankook Optima 225/65 R14 tyres.


Before and after polishing.

 The Globe wheels were in a bit of a state, see above. I polished out the worst of the surface pitting and painted the wheels in a less obtrusive black finish. They will be fitted with a very tidy set of tryes I picked up off Ebay for $110.
 Ralph was sent in to be checked wearing the Hustler alloys that were purcahsed for Z no.3. Shod with Yokohama 215/60 R14's, I figured there was a chance it would pass.
 But no. Eleven faults were found. The prop shaft UJ's were too worn, as were the front shocks, though the tester did say he would let this go. The seat needs work, but more on that at a later date. The pedal rubbers were too worn, the steeering wheel needed to be centred and the pesky earth problem raised it's ugly head again - just once - this time on the front left indicator. The brake fluid failed! I would naturally have this changed anyway, as a matter of course, but that was a bit of a surprise rejection. The Yokohama's had too much wear, too. Pity, as they are a really good looking tyre on the Hustler mags and do suit the car well. They will eventually get fitted with an equally smart looking tyre and go onto the car for every day use.


Spare prop shaft sripped and ready for paint.

Parts such as the pedal rubbers and new Uj's were quickly obtained and fitted. The spare propellor shaft got a paint strip and de-rust job. I coated it with a shiny black ultra tough finish, however, now I'm thinking I'll repair the original one, but leave all the dirt and patena on it. One can't recreate originality...